Excel VBA function to create a delimited file
I use this if I have a spreadsheet of values in a row of cells and I want
to turn that row into something I can use as a text import file. This
article walks you through how to create a custom Excel function named
CREATE_DELIMITED.
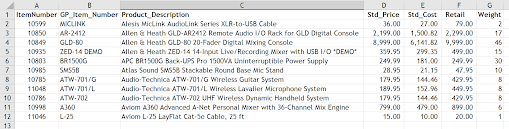
Let’s say we start with a spreadsheet similar to the one below. If you want to follow along, create a similar spreadsheet with a few rows of data. We want to turn this into a bar (|) delimited text file that we can use in a table import.
To accomplish this, we are going to produce the CREATE_DELIMITED custom function in this workbook. Later we will add it as an Excel add-in so it will be available to any workbook.
Follow these steps to create the function:
1.
Open a new blank workbook.
2.
Press Alt+F11 to open the Visual Basic Editor, and then
click Insert > Module.
A new module window appears on
the right-hand side of the Visual Basic Editor.
3.
Copy and paste the following code into the new module
'Custom Function to join a range of cells together with an optional
delimiter
Function CREATE_DELIMITED(ByVal cellRange As Range, Optional ByVal
delimiter As String)
Dim c As Range
Dim DelimitedText As
String
Dim Count As Integer
Count = 0
DelimitedText = ""
For Each c In cellRange
Count = Count + 1
DelimitedText =
DelimitedText & c.Value
If Count <
cellRange.Count Then
DelimitedText =
DelimitedText & delimiter
End If
Next
CREATE_DELIMITED =
DelimitedText
End Function
Using custom functions
=CREATE_DELIMITED(A2:G2,"|")
It will produce this:
10599|MICLINK|Alesis MicLink AudioLink Series XLR-to-USB
Cable|36|27|79|2
------------------------------------------------------------------------------------------------------
For a quote delimited file separated with commas, use this:
=""""&CREATE_DELIMITED(A2:G2,""",""")&""""
"10599","MICLINK","Alesis
MicLink AudioLink Series XLR-to-USB Cable","36","27","79","2"
------------------------------------------------------------------------------------------------------
For a comma delimited file use this:
=CREATE_DELIMITED(A2:G2,",")
10599,MICLINK,Alesis MicLink AudioLink Series XLR-to-USB
Cable,36,27,79,2
------------------------------------------------------------------------------------------------------
Creating the Add-in
To make this function available to any workbook, delete all of the data on
the worksheet and save the file as an Excel Add-In.

Accept the location that Excel suggests, name the file something descriptive. I saved mine as CREATE_DELIMITED (so original, I know).
Select the Developer tab from your toolbar (you may have to add this, it doesn’t appear automatically). Then select Excel Add-Ins. Your list of add-ins appears, just check the one that contains your CREATE_DELIMITED function and you’re good to go.

Now you should be able to use this function in any workbook you create. If
you don’t see it, check the Excel Add-ins toolbar item to make sure the
Add-in is marked.
Until next time!
Leslie
No comments:
Post a Comment